Tuesday, December 29, 2009
A New Post, Wherein;
~ Our narrator, succumbing to the vain allurements of folly and fashion, steps into frame ~ The gross effects of holiday overeating are revealed and laid bare for comments, criticisms and judgment ~ A new sawing technique is demonstrated for the first time (in these annals) ~ A brother, unspoiled by praise or blame, heroically takes up the camera and performs admirably ~ A stout oaken plank is bent to the will of the craftsman ~ A dogsled is returned to trail readiness ~ And - Only Hand Tools Are Used!
Umm...sorry. Got carried away there. A combination of Rex Beach's "The Silver Horde" (1909) and "Fifteen Thousand Useful Phrases" by Grenville Kleiser (1917). Dreadfully sorry. I shall endeavor to contain myself...
Earlier today I responded to a comment on a previous post where a reader had stated that I clearly enjoy all aspects of making something out of wood. I agreed, saying that sometimes I enjoy the process more than the product. This post is a perfect illustration of how the process can trump the product - which in this case was nothing more than a rectangular stick with a half-dozen holes drilled in it.
My brother Josh, a recreational dog musher, asked if I could help him fix one of his broken sleds, and I happily agreed. So, the week before Christmas, Josh and his daughter Kaija came over to visit the shop (Kaija actually had her own project to work on - but that's a future post). One of the oak sled stanchions had broken after an abrupt meeting with a spruce tree. Actually, it's more complicated than that, but Josh isn't here right now and that's my version of what happened.
Here's a shot of the part to be replaced:
Josh brought a lenght of oak that was just big enough to form the new stanchion. The main job here was ripping, so the trusty Disston D-8 was called for:
This was one awkward board to rip - hard to hold on the edge of the saw bench, and too narrow for the slot down the middle. I ended up starting it at an angle across the bench and had to stop frequently to readjust - and avoid cutting into the bench.
As I got closer to the end of the rip, I reverted to my normal stance. When discussing the use of this saw bench before, I've tried to describe this position in words, but a picture is better:
At the very end of the board a chunk had been cut out for some past project. The gauge line almost, but not quite intersected this void. Of course, I could have stopped ripping and just planed this slightly wider section down to the line, but where is the challenge in that? Time to put theoretical knowledge into practice! I decided to flip the saw around, sit on the board, and try my hand(s) at overhand ripping:
Hmm, I have been eating too much...
Anyway, it worked better than I would have guessed:
After that I cleaned up the rip and straightened the edge with a jointer plane.
Hey, isn't that a plump grizzly bear chowing down on an enormous cream cheese covered bagel on my shirt? Fitting - isn't it...
Josh provides the obligatory shavings shot:
I used an awl to transfer the holes from the existing part to the new one...
...and then bored the smaller holes with a hand drill...
...and the larger hole with a brace and bit:
After that it was just a matter of bolting it into place. Here's Josh working on that:
So, a thoroughly enjoyable process that yielded a completely mundane product. Cool.
Of course, when joined to its other mundane friends, that part becomes a sled capable of the extraordinary process of mushing. Hmm.
Sunday, December 27, 2009
Making Handles for New Tools
Wow, the holidays sure are crazy! I've been so busy that I haven't done a post in almost two weeks. Ironically, I've actually been in the shop quite a bit working on several projects. In the beginning I was taking pictures to use for a couple of posts, but by the end, I was so crazed trying to finish up two Christmas presents that I didn't slow down enough to even think about taking pictures. Maybe I'll do a short "final product" post on those gifts...
But today I could relax in the shop, and I used my time to make handles for three new tools my wonderful wife gave me for Christmas: two Japanese milled-tooth files and a Nicholson #49 pattern maker's rasp. Yes!
I dug up some birch for the handles...
...and split it into rough blanks with a hatched and maul.
I cleaned up the blanks with a scrub plane and spokeshave. Then I found some copper fittings to use for the ferrules, and transferred the diameter to the handle stock using pencil graphite.
I carefully (sort of) sawed around the shoulder and then pared the tenon with a chisel. I did the final rounding with the rasp itself - it would have been much easier to use (safer too) if it had only had a handle - hmm...
I don't really have a "design" for my handles. I just make them feel comfortable in my hand. I tend to end up with some variation on a general theme of tapered octagonal prisms.
Here's a shot of the finished handle, with ferrule and final shaping complete. The chamfering of the end was done with a chisel, while the tiny chamfers on the shoulder (not visible in this shot) I did with a knife.
After making the first handle (for the #49 rasp) with the copper left bright, I decided to experiment with giving the next ferrule some patina. My attempt at using heated mineral oil created a mottled look that I actually like very much. It's different than the uniform black I created on the bolts for the turning saw project. I'm not sure if it's a result of using mineral oil instead of linseed oil, or if it has something to do with the copper.
Here are two final group shots:
Oh, and how do they work? Fantastic! Especially the rasp - what a revelation! Thank you for the wonderful gifts Sweetie!
Tuesday, December 15, 2009
The Woodwright's School
You may have seen this already, but just in case you missed it: Roy Underhill has launched The Woodwright's School website and it includes online registration for the Winter 2010 classes. It also has some great downloadable plans, including the folding book stand I recently posted about.
Man does that make me hate living in Alaska just now. Well, that and the 5 hours of daylight - come on solstice!
You can check it out here: The Woodwright's School
Monday, December 7, 2009
Planes and Shavings: Four Portraits
Tuesday, December 1, 2009
Folding Book Stand Revisited
One of the very first posts on this blog was about a folding book stand I made for my wife. In The Woodwright's Workbook, Roy Underhill writes about this stand, which he calls a reading stand. It's in the Domestic Devices chapter of that book, which is a must read if you are interested in hand tool woodworking - as are ALL his books.
As I stated in the original post, it was the first true hand tools only project I attempted. I also helped my nephew James create his own version (which you can read about here, here 2 and here 3). I think it is a fun, and challenging project with some "wow" factor as it is made out of one piece of wood.
A while back a blog reader, who has made some awesome book stands of his own, asked if I could post some more detailed pictures of the hinge layout that I used. This post is the belated (sorry Craig) response to his request.
The first step is to lay out a square on the edge of the stock. Then, divide this in half both vertically and horizontally. Finally, connect the four mid-line points to make a diamond shape (okay, okay - so it's really just a rotated square - sheesh, Shape Police!). This then gets transferred across to the other edge and replicated. Lay out an odd number of hinges and start chopping and paring. If you work on the hinges closest to the edges, you can use the side layout to help guide both your angle and depth. Use these as guides for making the rest of the cuts. Then it's just a matter of sawing down and up to the hinges - look for the sawdust falling out from the hinge openings. If you worked carefully, the only thing holding the stand together at this point is the thin web of wood between each hinge. Use a very thin knife blade to cut these free and the stand will pop open. Fun!
Here's a close-up of the closed joint and layout lines. As you can see, I was not particularly careful with the rip sawing coming in from the left. I over-cut into the edge hinge. Doh! But it all came out okay - just be careful on the last couple of saw strokes.
After that, it's just deciding what shape to use for the legs and decorative top. The one in Roy's book, from Andre Roubo's Art of the Cabinetmaker, has a kind of double ogee top. I decided to base mine on the shape of old tombstones I used to see back east.
One last note - Roy mentions that Roubo describes creating a circular joint for this stand. I can see how that would work, but I've never tried it. Maybe on my next one...
Wednesday, November 25, 2009
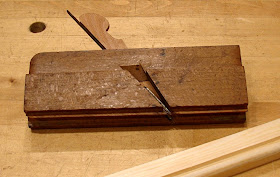
Replacing A Moulding Plane Wedge
The other day I successfully replaced a broken wedge on a side bead moulding plane that I bought on eBay. This was an almost "perfect" project. What made it special was a combination of many of the things I especially enjoy in a project: an old tool brought back to life, using shop-made equipment (successfully), finding a suitable job for a special stash of wood, applying my developing skills to overcome a lingering mental block, and a full and complete project in under two hours. That's a rare single project combination in my shop!
I'd had this plane for a while, but had not been able to use it because the wedge that holds the iron had broken off the very first time I tried to remove it (and yes there is an embarrassing story there, and no, I'm not going to tell it now). I successfully removed the remainder of the jammed wedge from the plane by turning it upside down, clamping the stump of the wedge in the bench vise and lifting the plane body off of it. But that is when the mental block came into play. For some reason I was intimidated by the idea of making a replacement wedge. I'm not sure why, but I convinced myself that this would be a hard thing to do. Stupid. And so this poor plane had been languishing on my desk; the island of misfit tools.
Here's a shot of the original wedge:
The first step was to prepare some stock. I was going to use some oak, when I remembered that my good friend Dave had sent me some hunks of salvaged beech wood, which would be much more appropriate. Thanks again Dave! After cutting a piece and resawing it to approximate thickness, I planed it to final thickness by working against one of my bench dogs. This is a handy trick for thin stock. I also traced the outline of the original wedge (after piecing it back together) on the new blank.
Taking it over to my saw bench, I used the slot in the overhanging end as a birdsmouth and cut out the shape of the wedge and finial with a coping saw.
To ensure that the straight edges of the wedge were true, I used a plane. It's difficult to secure small pieces and accurately plane them, so in this case I found it much easier to hold the plane in the vise and push or pull the wedge along the plane. Kind of like a miniature power jointer - only without the power :)
I cleaned up the finial curves with a file, and after some trial and error adjustments to the wedge angle, I had what looked and felt like a good fit. But there was only one way to be sure. A quick trip to the Scary Sharp bench, and the ca. 1850 Winsted plane was ready for a test drive on the sticking board; it worked great!
And here's a final shot of the now happy plane, ready to join its brethren on the shelves:
Saturday, November 21, 2009
More Books...
Just wanted to mention that I've updated my List-O-Books link in the left sidebar. It's under the Woodworking Library heading. I also made the link font bigger (thanks Josh!). As always, my favorites are in bold. If you see anything you'd like more information about, feel free to post a comment here or email me.
Here are a few of the latest additions to the library with accompanying notes:
How to Make Mission Style Lamps and Shades - I've been eyeing this book for at least a year at a local used book store. As I think I am getting ready to try my hand at making a lamp, I thought this book might prove useful.
Making Chair Seats from Cane, Rush, and Other Natural Materials
The Craft of Chair Seat Weaving with Cane, Rush, Splint and Rope - These were more of a long range purchase. I'm sure at some point I will want to learn how to do this, but the books were available now.
The Best of Fine Woodworking: Beds and Bedroom Furniture - Full of good ideas. Most of the techniques are power tool oriented, but I bought this more for the design information.
Country Pine Furniture - This is a book written for the "collector" - I have a number of these in my library. The text of these books I find frequently strange, sometimes interesting, and occasionally flat out wrong (IMHO). They do however, tend to include nice photographs which I love to pore over.
Williamsburg Reproductions - Now this one is really odd. It's a catalog from the early 1970's. It covers reproductions of everything: furniture, china, wallpaper, lamps, trivets, candles, silver, pewter, paint etc. While it does have some photographs of historical pieces (including a paneled chest which also appears in the Country Pine book above - synchronicity!) it is almost entirely devoted to listing and selling reproductions - but I still found it an interesting potential resource for ideas.
Sunday, November 15, 2009
Making A New Turning Saw - Part V
There wasn't much left to do on the saw, but it still took me awhile. I snuck in one short work session during the week and one longer one today and the saw is done! Wahoo!
To mount the knobs and rods I had to bore holes through both arms near the bottom. First I had to rework the bottom section of the "handle" arm. I had left it wider than the other arm, and while I am sure I had a reason, I couldn't remember why I had done that, and it didn't allow for enough of the rod to clear the arm. While using the spokeshave, I went ahead and reworked the curve in the bottom of the stretcher to more closely match the curves of the arms. After that, I used a brace and bit to bore both holes.
Here's a shot of the saw, at that point:
That was all I accomplished during the week. Today I moved on to mounting the blade in the rods. After filing a flat to stop the bit from sliding off the bolt, I used my small hand drill to make the holes for the pins that would hold the blade. I experimented a little here, and heated the first bolt to red hot and let it cool. I wanted to see if it made a noticeable difference. It didn't. Hmm. That's the opposite of what I experienced with the bolt heads. Maybe I'm mental. I don't suppose bolts have that much carbon in the steel - so no dramatic change makes sense.
Here's a shot of the first bolt in the vise:
Then, using a hacksaw, I cut the slots for the blade. I returned the drill bit to the hole to help me align the slot at right angles to the hole. Here's the result:
Now it was blade time. I assembled the saw and measured the distance between the pins (3p finish nails) in the rods. Then I subtracted 1/16 of an inch and I had my distance for the pin holes in the blade. This would bring the bottoms of the arms together slightly, allowing for the blade to be stretched taught when the tension mechanism pulled the tops of the arms back together, and the bottoms apart. The 1/16th was just a guess. Turned out I should have made it more like 1/8th, but I'm getting ahead of myself.
I cut the blade with an extra 1/4 inch beyond each hole location. Here's my high tech band saw blade cutting apparatus:
It worked great and had no trouble cutting the 1/4 inch blade. The vise allows for more control and the use of body weight to assist with the cut.
To drill the pin holes in the blade, I just clamped the blade to a piece of scrap and had at it. It took some pressure to get started, but once it did, the bit had no problem. I did use my fist under my chin to help apply steady pressure on the handle of the hand drill.
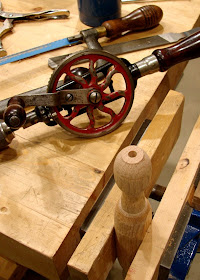
I have heard of other's punching holes in the blade with a hammer, a punch and a block of hardwood (end grain up). I tried this before and didn't have good results. For whatever reason, I've had much better luck with just drilling. Maybe my blades are cheap or something...
Once the blade was mounted in the rods I could make the simple tensioning system. I cut about 12 feet or so of twine and soaked it liberally with mineral oil. It's my pet theory that the oil allows the fibers and strands to slide over one another and "self adjust" so that they all share the load equally. I have no proof that this works, but I dramatically reduced my breakage rate once I started using this approach.
To apply the twine, I wrapped it around one arm several times and then started looping it around both arms. When I ran out of twine, I wrapped the running end around the loops several times and then passed it through between them. I inserted the toggle stick between the loops and started winding. As the twine twisted tight, the extra oil got squeezed out. I just rubbed it into the saw.
To test the blade tension, I plucked it with a fingernail. Here's where I realized that I should have shorted the blade holes by 1/8 rather than 1/16 of an inch. The tenons were fully seated and the blade was not fully tensioned. The real fix would have been to make a new blade, and I probably will - at some point. The temporary fix was to put a washer between each knob an the frame. I kept on applying tension until it started to sound musical; changing from a "thunk" to a "twang!"
Time for some test cuts. Not very pretty, but that was my fault not the saw. I wasn't really watching what I was doing: I kept looking at the saw to see if it was flexing or moving. Nope - ship shape! It worked great.
Here's a final shot of the new turning saw posing in front of its predecessors:
Oh yeah - when I took that last picture, I had forgotten to snip off the nails that are functioning as the pins to final size. Quick work with nippers - should have done it before the picture. Doh!
Tuesday, November 10, 2009
"Bonus Fun" Answers
Okay, here are the answers to the "bonus fun" challenge from the last post (click on image for a larger view):
#1 - Vise Grips
#2 - Hand Screw (Jorgensen type)
#3 - Miller Falls #2 Hand Drill
#4 - Generic "eggbeater" Hand Drill
#5 - Vaughan "Bear" Japanese Style Saw
#6 - North Brother's "Yankee" 2101 8" Brace
#7 - Adjustable "Crescent" Wrench
#8 - Sock
#9 - Irwin 1/4" Auger Bit
#10 - Stanley #40 Scrub Plane
#11 - Stanley #5 Jack Plane
#12 - Extra Large Gouge
#13 - Parting Tool
#14 - Bowl Gouge
#15 - Spindle Gouge
#16 - Half Round File
Thanks to all who participated - particularly Clarke and Brian, this challenge's Ubergaloots! I salute you!
Sunday, November 8, 2009
Making A New Turning Saw - Part IV - Now With Bonus Fun Attached!
Well, the new turning saw is almost finished. There were only two things left to work on, the tensioning mechanism, and the blade (or web) assembly. Really pretty straight forward - which of course, in my shop, just cannot be tolerated! It was time to make things "better".
My first idea on improving things was by changing the way the rods that hold the blade were attached to the knobs. On the couple of turning saws I've made before, the rod was simply epoxied into the knob. Very easy to make and works fine - or did, until the epoxy lost its hold on the rod in the prototype saw. This started me thinking; could the rod be mechanically fastened to the knob? I played around with numerous versions including threaded inserts, jam nuts, all thread, etc. etc. I even build a mock-up to test a couple of these ideas:
Finally, I decided to just use a carriage bolt that passes all the way through the knob. By squaring the hole with a chisel, the squared shank of the bolt (just under the head) will keep the rod from turning independently of the knob. I didn't however, like the look of the bolt head - especially the raised three letter part code. So, as frequently happens, one solution created another challenge. I ended up heating the bolt head red hot and peening it in the pritchel hole of my small anvil to create a "hammered" look. Then I tried something new, which I had only read about - darkening the steel with an oil patina.
Here's what I did. I put a thin coat of Tried and True Original Wood Finish (linseed oil and beeswax) on the bolt heads. Then, holding the bolts in a machinist's vise, I heated the shank below the head with a torch until the oil began to smoke and darken. It took a little practice to get the heating just right. Too much heat (the first time, I heated the bolt head directly) and the oil burnt off completely - too little and it just looked bad and didn't harden. In the end, I had bolt heads that were black, with dark amber highlights. Cool! I really like it when a project takes me into new territory - especially when it works out well.
At this point I should have been almost done, but after looking at my curvy, rounded saw parts, and the straight, faceted design of my knobs I knew it was time to break out the spring pole lathe and make some rounded knobs.
Here's a shot of my spring pole lathe in storage:
And here it is in action:
Several years ago I started building a fly-wheel treadle lathe ala St. Roy. It was slow going and mid-build, eager to see if I even enjoyed turning, I converted it to a spring pole set-up. I rigged up a shock-cord spring on the ceiling and built an overly complex (hmm...) treadle. It worked well enough for me to make the shaker pegs for the peg board coat rack that now lives under the medicine cabinet; and I haven't finished the fly-wheel part - yet.
After turning the knobs, I drilled the holes for the bolts, cut the knobs to length, created a square mortise for the carriage bolt shanks, and they were ready to go:
Now all that is left to do is cut the slots and pin holes in the rod ends to hold the blade, cut the blade to length, and mount it. Then wrap the cord and use the toggle stick to create tension. That's it!
Oh, well that, and actually test it and see if it even works! Details, details...
Continued and CONCLUDED (I swear!) in Part V.
BONUS FUN!
While you are waiting for Part V, here's a random tool shot and a bit of fun. Can you name the 16 hand tools visible in this photo? Ubergaloot status granted to the first commenter with the correct list! Or the closest list; this might be harder than I think. Click on the image for a larger view and give it a shot!