Friday, December 31, 2010

Millers Falls Auger Handles


After the last post about my drilling/boring tool panel upgrade, a reader (Alfred) was curious about the two auger handles visible at the top of the panel. He specifically wanted to know the range of auger sizes these handles could accommodate: "Do those handles accept the regular brace auger bits/ only the larger ones, or do they require special size bits?"

I promised to find out, and in the process my curiosity about the two handles was piqued. So here's the answer to Alfred's question and a bit more (okay, that one was not intentional ).

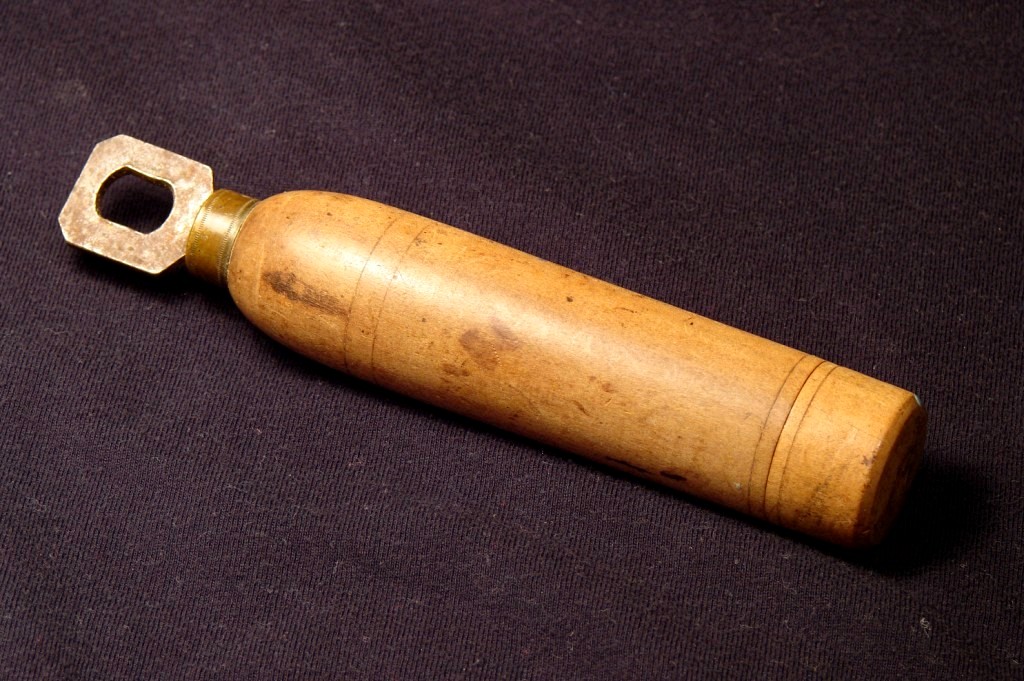
First up is the Millers Falls No. 2 auger handle, as described in their 1925 Catalogue:


Mine is a newer version (it has the Greenfield, Mass. address, rather than the older Millers Falls, Mass. address) but as far as I can tell it is the same as the one in the catalogue. Well, with the exception that someone seems to have gone crazy on it with some spar varnish. "Oooh! Shiny!"

This shot is the front side, with the smaller of the two square "jaws":


Here is the reverse side, with the larger opening:


It's a pretty simple device really. Just loosen the wing nuts, insert the auger, and clamp it tight, with one "jaw" holding the tapered end and the other the shank.

As their catalogue copy states, it can handle very large augers:


But it can't handle the smaller bits:


The auger in the handle is a 13/16ths, which was the smallest I could fit securely. The 4/16ths on the bench top was impossible to use in the handle.


Now on to the Millers Falls No. 4, again from the 1925 catalogue:


Mine might actually be a copy, as I can't find a single identifying mark on it, other than an owner's stamp of "Leo Putnum".

Here you can see the beefy two jaw chuck:


And from this angle you can see the ratchet control lever to the right of the auxiliary handle attachment point:


Speaking of the auxiliary handle placement - here it is:


The end part of that handle rotates on its own, much like the pad on a brace.

This is one versatile beast. It easily handles (not another one!) the biggest auger I have:


As well as the smallest:


Although, come on, that seems like using a sledge hammer to drive a 4d nail.


Wednesday, December 29, 2010

Drilling/Boring Tool Panel


Time is funny. Just the other day I was thinking, "You know, I really ought to upgrade my drilling/boring tool panel like I did to the saw panel a few months ago." Turns out it's been almost 11 months! What?! Where did that time go? Deja-vu - I think I've said this before...

Well, regardless of my lack of time reality, the idea was a good one. The drilling/boring panel was one of two pegboard panels still hanging on in the shop (yes, intended). It was time to convert it to something that not only works, but makes me happy when I look at it. (Don't get me wrong, I don't hate pegboard, but it just doesn't satisfy me at some level.)

Here's the before shot:


Besides making it look nicer, I wanted to expand the amount of storage to include new tools (some of which don't technically meet minimum "drilling/boring" requirements - oh well, I'll deal). The new panel would be slightly wider, and a good bit longer.

Construction-wise, I followed the same process as with the saw panel, with only one difference. I used a nice set of Sandusky Tool wooden match planes that were designed for the thickness of wood I was working with (3/4"). This let me avoid dealing with the "second tongue" effect that the Stanley #49 created, while at the same time leaving the tongue offset enough for beading the front edge, unlike the Stanley #48. Hmm - I guess progress isn't always progress is it?


And here is the final result:


I think it would look even better if I had the time to make all new shelves and holders, rather than just modifying the old ones (I did add one "new" shelf, but it was just a left-over from another part of the shop overhaul). Maybe later...

That just leaves on last pegboard panel in the shop, and I'll get to that soon. Soon as in next November?


Tuesday, December 28, 2010

Mystery Tool - Solved!


I love it when a mystery gets solved, but I kind of hate it when I should have known it all along!

After the first post, Damien commented: "Looks like a free standing handle that fits a round axle with two sides flattened at the end." I immediately got a picture in my head of a round chuck with two flats, but I kept thinking it had something to do with sewing machines.

And then on the second post, Alfred commented "I wonder if it is a wrench for an awl. Some older leather working awls have a split chuck with a tightening screw that probably fits the opening in your tool."

After reading that I gave myself a huge dope slap and ran out to the shop where I have several cobbler's awls that I use to start screws etc. Grabbing one, I tested it out and it's a perfect fit. Awesome! Not only is the mystery solved, but I have a new and useful tool. In the past I just used an adjustable wrench to change awls (sharpened nails actually) but it tends to slip off - the new closed wrench will be much better.


Just to double check, I looked in my library and found an illustration under "Sewing Haft" in the "Dictionary of American Hand Tools" that clearly shows just such a wrench changing the awl on a haft or handle.

If anyone has a copy of "Dictionary of Leather Working Tools and the tools of allied trades", by R. A. Salaman, we could probably find the actual name for this tool. Until then, I'm just going to call it a "cobbler's awl wrench".

Fun! Thanks everyone for your ideas and sleuthing! And way to go Alfred for nailing this one!


Sunday, December 26, 2010

Mystery Tool - Additional Photos and Thoughts


A few additional pictures of the mystery tool along with some new thoughts and observations. You can click on any picture for a larger view.

Full tool, with quarter for scale and a new angle on the "loop" to show thickness:


A close-up of the business end - note wear pattern inside opposite corners of the slot (which I think indicates it was used as some kind of wrench):


A close-up of the end of the threaded cap - showing what I previously took to be the initials "B.H." - although now I am not so sure:


My brother Josh thinks that this might have been some kind of sewing machine wrench for changing needles, which were stored in the compartment in the handle. I like that guess, but so far I have not found any supporting information.

What do you think?


Thursday, December 23, 2010

Mystery Tool


Well, after the last mystery object played itself out, there was a request for a new one.

So, for Philip, and anyone else who likes a mystery, here it is:


Approximately 5 1/2" long and...


...it has a storage compartment in the handle.

It's very well made with some nice details such as the tiny decorative marks on the ferrel and the rings on the handle. The only other markings I could find were a somewhat cryptic group of awl pricks on the butt end which I am fairly certain spell out "B.H." - they were definitely done by hand and not too neatly, so I don't think they are the maker's mark, but rather a previous owner.

At first I was thinking it was some kind of multi-tool, but there is no chuck, so any attachments would need to hook onto the loop somehow. Also, the storage compartment is pretty small, more along the lines of drill bits etc., and I don't see how those would hook onto the loop anyway.

Any ideas?


Sunday, December 12, 2010

Owner's Mark Stamp


In a previous post, I shared some thoughts and observations on plane owner's marks and I ended up wondering how to make my own metal owner's mark stamp. Well, it's been over a year, I still don't know how to go about it, but I have finally gotten my hands on an original to aid in my quest.

It was made for one "C. B. STILWELL" by "JACOBS & CO 74 WASHN.ST BOSTON".

Here's a photo of the stamp and the mark it makes:


I am hoping that by closely examining the stamp, I can figure out how it was made. It seems clear to me that files were used - very tiny files, for the exterior of each letter. But I haven't yet sussed out how the interior sections were shaped.

Here's a closer shot of the business end:


I know I could pay someone to make one for me, but that just isn't my style. I might get there one day if I can't figure this out...