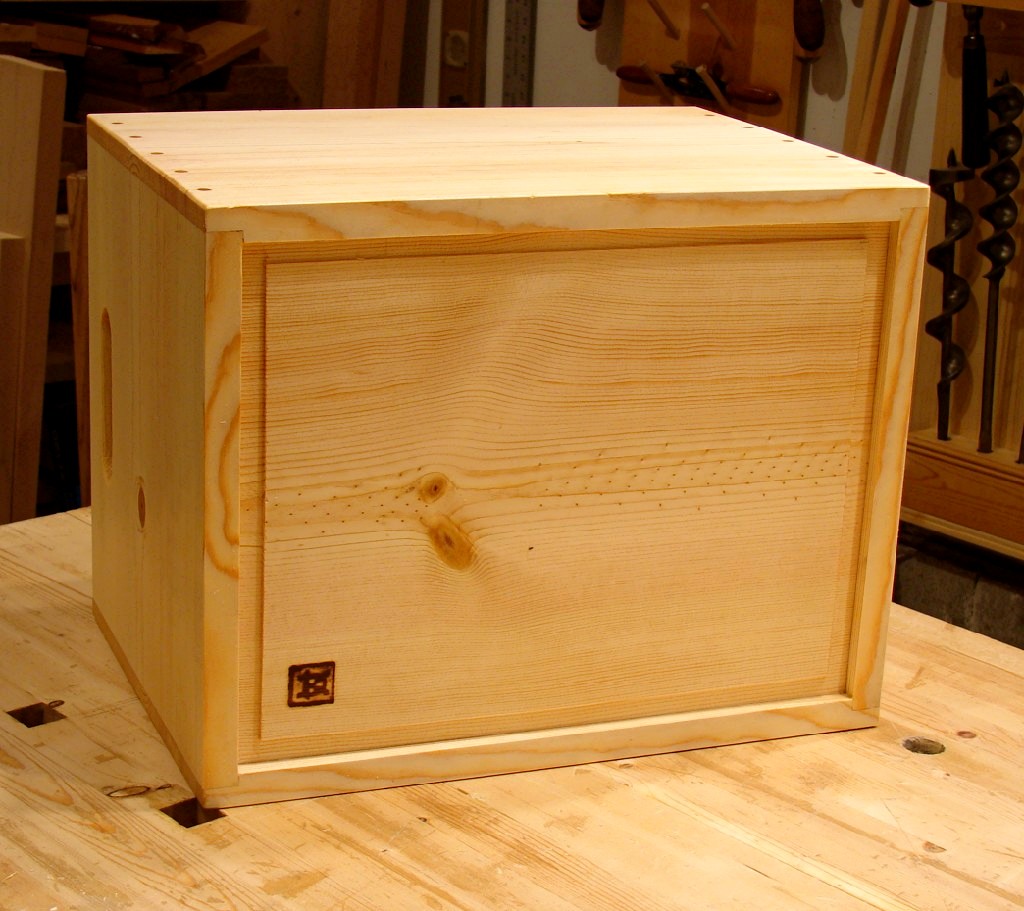
My students' wooden flutes have been forced to live in a plastic tub - and that just isn't right! It was time to fix that situation...
In this first shot, I was several steps into the process, but the tools tell the tale. I'd already done the layout with the knife, square and folding rule; cut the 1x12 stock to length (with the saw you can't see...); trued up the end grain with the block plane; and plowed the grooves for the bottom with the Stanley 45, while holding the stock with the holdfasts (set with the mallet).

Then it was time to make the rabbets in the ends, which would hold the sides. I experimented with a slightly different process here. Instead of using the rabbet plane's nickers to cut the grain and thus make a clean rabbet, I marked them first with a gauge and then cut them freehand with a knife. I didn't cut to the bottom of the rabbet, just the first 1/8" or so. Once the rabbet is established, the plane continues to make a clean rabbet, even though nothing is cutting the cross grain ahead of the iron. What's the advantage? Well, if I'd used the nickers, the cut would show on the top of the finished box, as the nicker cuts deeper than the iron plows.

It was plowing those rabbets that produced the shavings shown in the last post. They made me really happy.

I had decided to put a solid wood panel in for the bottom, so I raised a field with the rabbet plane held at an angle. No fancy set-up, just tilt and plow. I checked my progress from time to time with one of the sides. Once that groove fit snugly, it was just a matter of making all the beveled rabbets the same. I didn't need to measure anything, I just made the edge where the two bevels met run evenly from the corner of the field to the corner of the stock.

The ends have handholds cut into them. I started this process by boring three 1" holes. The two outside holes form the ends of the handhold while the center hole just helps with stock removal.
I do almost all of my boring and drilling on my low bench (which I frequently refer to as my saw bench, since that was the original purpose for which it was built). The center slot in the bench makes it easy to work without harming the bench.

You don't want to bore straight through the stock - well, not if you don't want a splintery explosion as the bit breaks though. You just want to bore until the lead screw is exposed, and then flip the stock over and bore in from the other side. If you read about using a brace and bit in books, they almost always tell you to reach under and feel with your fingers for the lead screw every few rotations. What they don't usually tell you, is that by really paying attention to what the tool and your body are telling you, you can feel when the tip is exposed while you are still boring. No reaching is necessary. With a little practice, you might just surprise yourself how accurate this method can be (see picture below). Hand tools rock!

The waste between the holes was quickly removed with a chisel - again working in from both sides.

Then, just a little cleaning up with rasps and files and they were done.

I saved the final smoothing of the stock for last. I planed with the stock resting against the bench dog.

Glue-up. I really like the Lee Valley cabinetmaker's glue.
You might be wondering about the yogurt container lid that I use as a glue tray. It really isn't aesthetically pleasing - at all. But, it works great. The dried glue just falls right off when the lid is flexed and it's ready to go again. That one lid has served faithfully for the last two years. A rare case of function over form...

And three shots of the finished box:


And one with the whole tool kit for the project:

I took this into class, the plastic tub was banished, and the flutes are so much happier in the wooden box. A not so rare case of form over function...


 Posts
Posts