Tuesday, August 2, 2011

"Red and Yellow and Pink and Green...


...purple and orange and blue!
I can sing a rainbow,
sing a rainbow,
sing a rainbow too!

Listen with your eyes..."

Err...sorry - too much "Captain Noah" as a kid...

Anyway, it was time to decide which color to paint the latest project (full post coming soon) and once again the milk paint color sticks proved their worth. I just selected the options from the "oiled" sticks, and held them up against the wall in the future home of the project:


The winner is - "red". Which actually looks kind of burgundy in this light. Of course, that's the point of selecting the color under the actual lighting conditions.

Now, where am I supposed to send this picture?

Oh Yeah!

"Send your pictures to Dear Old Captain Noah..."


Thursday, July 28, 2011

Another Box


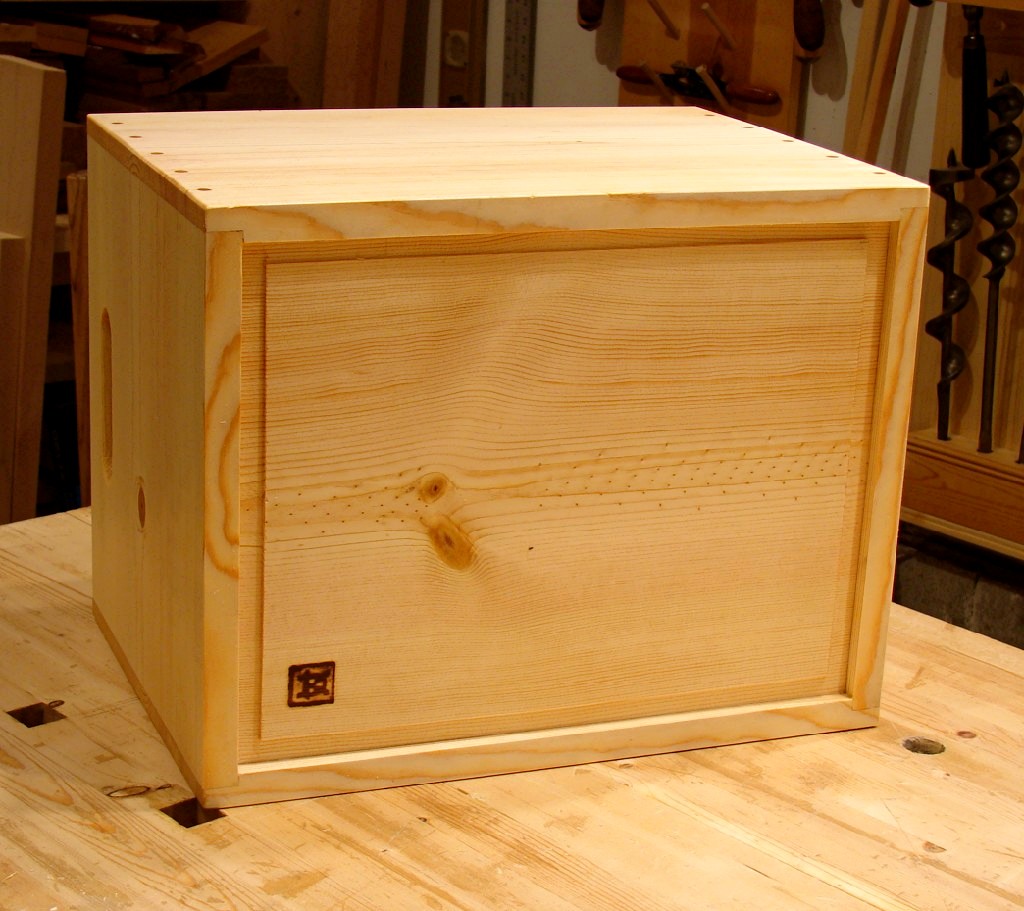
Here's a box I made at the beginning of summer - before the travel craziness set in.

It's basically a larger version of the pencil box made of sassafras instead of oak. I was planning on adding contrasting pegs, but in the end I liked the overall sense of simplicity that this box had, and decided that the pegs would just "busy it up" and ruin that feeling.


I really liked working with the sassafras - the shavings smelled fantastic!

Soon I'll be posting some interesting things I saw this summer, plus a couple of new projects that are on the bench...


Friday, June 10, 2011

New Workbench for School Shop


So, I'm sure that regular readers of this blog are familiar with my total lack of time reality. But just in case you might be thinking, "Hey, that Dan guy sure seems like he's on top of things time wise!"* I give you the following example.

My self established goal was to have 7 student created workbenches in our school shop by the end of 2010. How did I do? Well, not too good by that benchmark (err...sorry). It's June of 2011, school is out for summer, and we have one bench 99% finished, and 6 more somewhere around 50% finished.

Of course, in the big picture things are much, much better than that. We now have approximately 70 students who know how to measure, saw, glue, and plane. There's more: they have also been introduced (watching only) to sharpening plane irons by hand; they can bore with bit and brace and hand drill; they know the difference between jointer, jack, smoother and scrub; they have experienced the joy of shavings; they have discovered the satisfaction of working with their own hands to make something beautiful, useful and real. And as a bonus, they can explain (and debunk) numerous theories on the infamous saw nib!

So who cares if my original goal was not met - it was entirely unrealistic in the first place. It's the process, not the product - the journey, not the destination.

Now let's take a look at that new bench:


The bench is 5 1/2 feet long and the two separate tops are each 12" wide, which with the tool tray makes the whole thing about 2 1/2 feet wide. The tops are about 28" from the floor. The slats on the shelf conceal about 120 lbs of cement pavers spanning between the "L" shaped stretchers; combined with the robust build of the bench, that makes these quite heavy.

I went with the split top with tray for a couple of reasons. First, although I don't like a tool tray for myself, I think with students, it will help protect tools from falling off the benches. Second, the tray down the center creates a boundary for each student and should keep bench space evenly divided. Of course, when needed, the tray can easily be spanned (or filled for that matter) to utilize the full width of the bench.

This bench also features an updated version of the hockey puck leveler feet. I'll post more details on this later, but here's a quick summary of the new, much simpler system. First, I bored holes in the bottom of the legs that were slightly deeper than the length of a 5/8" all thread connecting nut. The holes were sized to be slightly smaller than the nut, which was then hammered in for a tight fit. The adjustable part is a 5/8" carriage bolt which is the same length as the nut. The rounded head sits in a shallow hole bored into a hockey puck, with the square shank "nut" part still above the level of top of the puck. This allows for an open-ended wrench to slide in and turn the bolt for very easy vertical adjustment. No jam nut, no washers, no lifting of the bench and puck removal to hold the bolt from rotating... I wish I had thought of this years ago - just simple and effective.

All that remains to do (the 1%) is to plane the ends (they are just straight from the saw), have each student stamp their initials into each piece they cut, plug the bolt holes in the top, bore the holes for our Gramercy holdfasts, do a little more flattening, and make wooden faces for the vise jaws. That might seem like more than 1%, but you'd be surprised how much work/time is already vested.

Oh, and the shop wasn't really that empty - we're getting ready to move it down to the ground floor. Slab floor - no more bouncing! Yay! Exterior door - easy wood handling! Double Yay!

I'm sure I'll get some shots of the new, new shop up early next fall. But wait, that's a time related goal, and you know how I am with those...

* I have no idea why you would ever be thinking such a thing, but let's just go with it...

Saturday, May 14, 2011

Birthday Toolbox


Well the years are flying by! Recently, it was time for Teague's third birhtday present from the shop - how is that possible? His first present was the skunk bench, and the second his blocks and their chest. This last year he has really been excited to spend time in the shop with me, so I decided it was time to make him his own tool box and start building his tool kit.

Here's the tote style box:


And his starter tool kit:


The kit in the box:


First inspection:


Full Approval:


The boy, standing on the chair from his grandfather's hardware store, and messing with his own tool kit - life is good!


And of course, his tool kit has already grown. His extra-small eggbeater hand drill arrived this week from eBay and has been throughly tested.


Tuesday, April 19, 2011

Foot Stool


Well, it's about time for a post!

This was a great spring project, as it was all about giving new life to an old foot stool. Well, more like an old foot platform - the original had no legs, it just sat on its cleats. I made it years ago for my Mother, who needed a 3" tall foot rest as part of some physical therapy.

I had saved it, and the time had come for it to grow into something new. I decided to add legs in the style of a Moravian chair, with the legs mortised into cleats which are let into the bottom of the two part top. The original cleats were too narrow for this purpose, and just screwed to the bottom. I removed the two end cleats, and created some 3 1/2" wide by 1/2" deep dadoes with saw, chisel and router plane. I then added larger cleats and also created a dado for the sole remaining original cleat.

Angled, tapered mortises were made with a brace, bit and tapered reamer. The legs were worked up from 2x2" stock with drawknife and spokeshave, and tapered to match the mortises.

Here it is with assembly complete and leveled with shims for trimming the legs to final length:


And a closeup of my high tech self-leveling device:


The finished foot stool:


And the boy approves!


This whole project didn't take more than a couple of hours total, but since I could only sneak in a very few minutes here and there, it took forever...


Saturday, March 12, 2011

Wooden Box for Wooden Flutes


My students' wooden flutes have been forced to live in a plastic tub - and that just isn't right! It was time to fix that situation...

In this first shot, I was several steps into the process, but the tools tell the tale. I'd already done the layout with the knife, square and folding rule; cut the 1x12 stock to length (with the saw you can't see...); trued up the end grain with the block plane; and plowed the grooves for the bottom with the Stanley 45, while holding the stock with the holdfasts (set with the mallet).


Then it was time to make the rabbets in the ends, which would hold the sides. I experimented with a slightly different process here. Instead of using the rabbet plane's nickers to cut the grain and thus make a clean rabbet, I marked them first with a gauge and then cut them freehand with a knife. I didn't cut to the bottom of the rabbet, just the first 1/8" or so. Once the rabbet is established, the plane continues to make a clean rabbet, even though nothing is cutting the cross grain ahead of the iron. What's the advantage? Well, if I'd used the nickers, the cut would show on the top of the finished box, as the nicker cuts deeper than the iron plows.


It was plowing those rabbets that produced the shavings shown in the last post. They made me really happy.


I had decided to put a solid wood panel in for the bottom, so I raised a field with the rabbet plane held at an angle. No fancy set-up, just tilt and plow. I checked my progress from time to time with one of the sides. Once that groove fit snugly, it was just a matter of making all the beveled rabbets the same. I didn't need to measure anything, I just made the edge where the two bevels met run evenly from the corner of the field to the corner of the stock.


The ends have handholds cut into them. I started this process by boring three 1" holes. The two outside holes form the ends of the handhold while the center hole just helps with stock removal.

I do almost all of my boring and drilling on my low bench (which I frequently refer to as my saw bench, since that was the original purpose for which it was built). The center slot in the bench makes it easy to work without harming the bench.


You don't want to bore straight through the stock - well, not if you don't want a splintery explosion as the bit breaks though. You just want to bore until the lead screw is exposed, and then flip the stock over and bore in from the other side. If you read about using a brace and bit in books, they almost always tell you to reach under and feel with your fingers for the lead screw every few rotations. What they don't usually tell you, is that by really paying attention to what the tool and your body are telling you, you can feel when the tip is exposed while you are still boring. No reaching is necessary. With a little practice, you might just surprise yourself how accurate this method can be (see picture below). Hand tools rock!


The waste between the holes was quickly removed with a chisel - again working in from both sides.


Then, just a little cleaning up with rasps and files and they were done.


I saved the final smoothing of the stock for last. I planed with the stock resting against the bench dog.


Glue-up. I really like the Lee Valley cabinetmaker's glue.

You might be wondering about the yogurt container lid that I use as a glue tray. It really isn't aesthetically pleasing - at all. But, it works great. The dried glue just falls right off when the lid is flexed and it's ready to go again. That one lid has served faithfully for the last two years. A rare case of function over form...


And three shots of the finished box:


And one with the whole tool kit for the project:


I took this into class, the plastic tub was banished, and the flutes are so much happier in the wooden box. A not so rare case of form over function...


Friday, March 4, 2011

Fun Shavings


Just a photograph of some fun shavings from my most recent project (which I'll post about soon).